Editor & Tool Configuration
Work Buddy
Connect WorkBuddy to AnyRouter with a custom model: in Settings, choose the Custom provider, enter the endpoint URL, API key and model name, then save and chat.
Overview
WorkBuddy supports connecting third-party custom models, letting you choose different large language models to power your conversations as needed. This article walks through the full configuration flow for connecting to the anyrouter platform.
- Click your avatar on the left to open the menu, click Settings to enter the settings page → Models. Manage custom models through the GUI — no need to edit config files by hand. Settings are persisted automatically after saving.
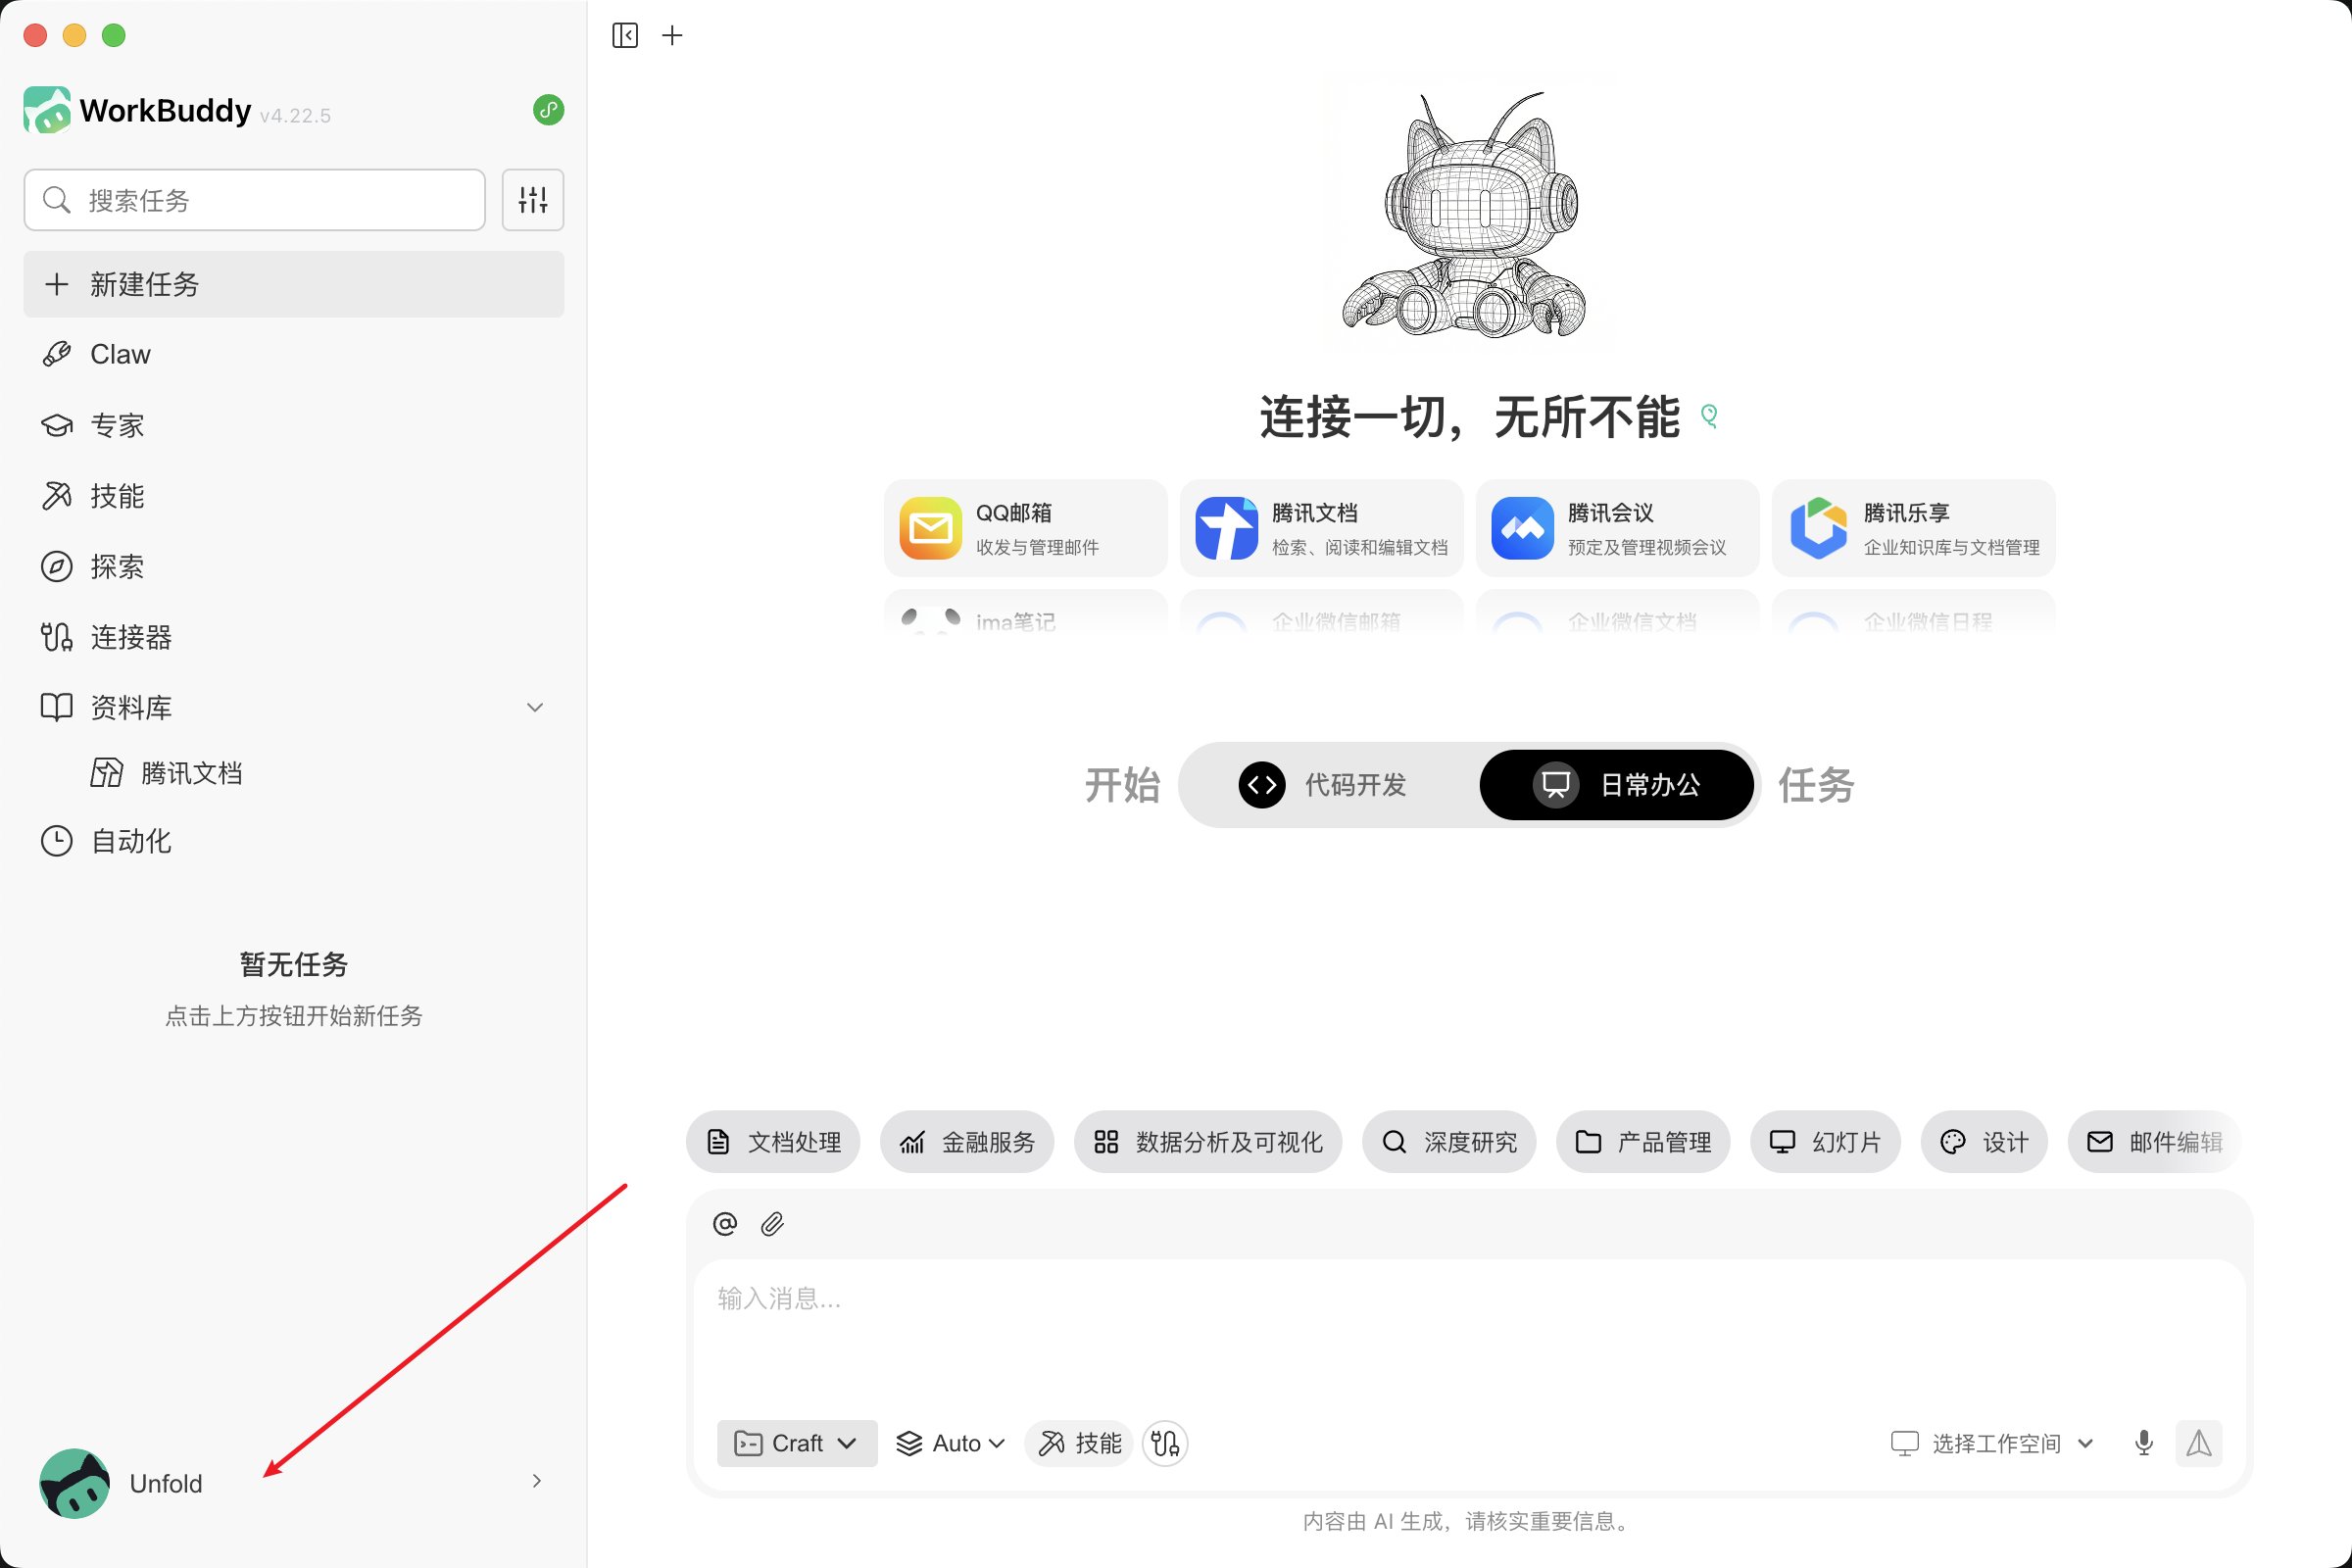
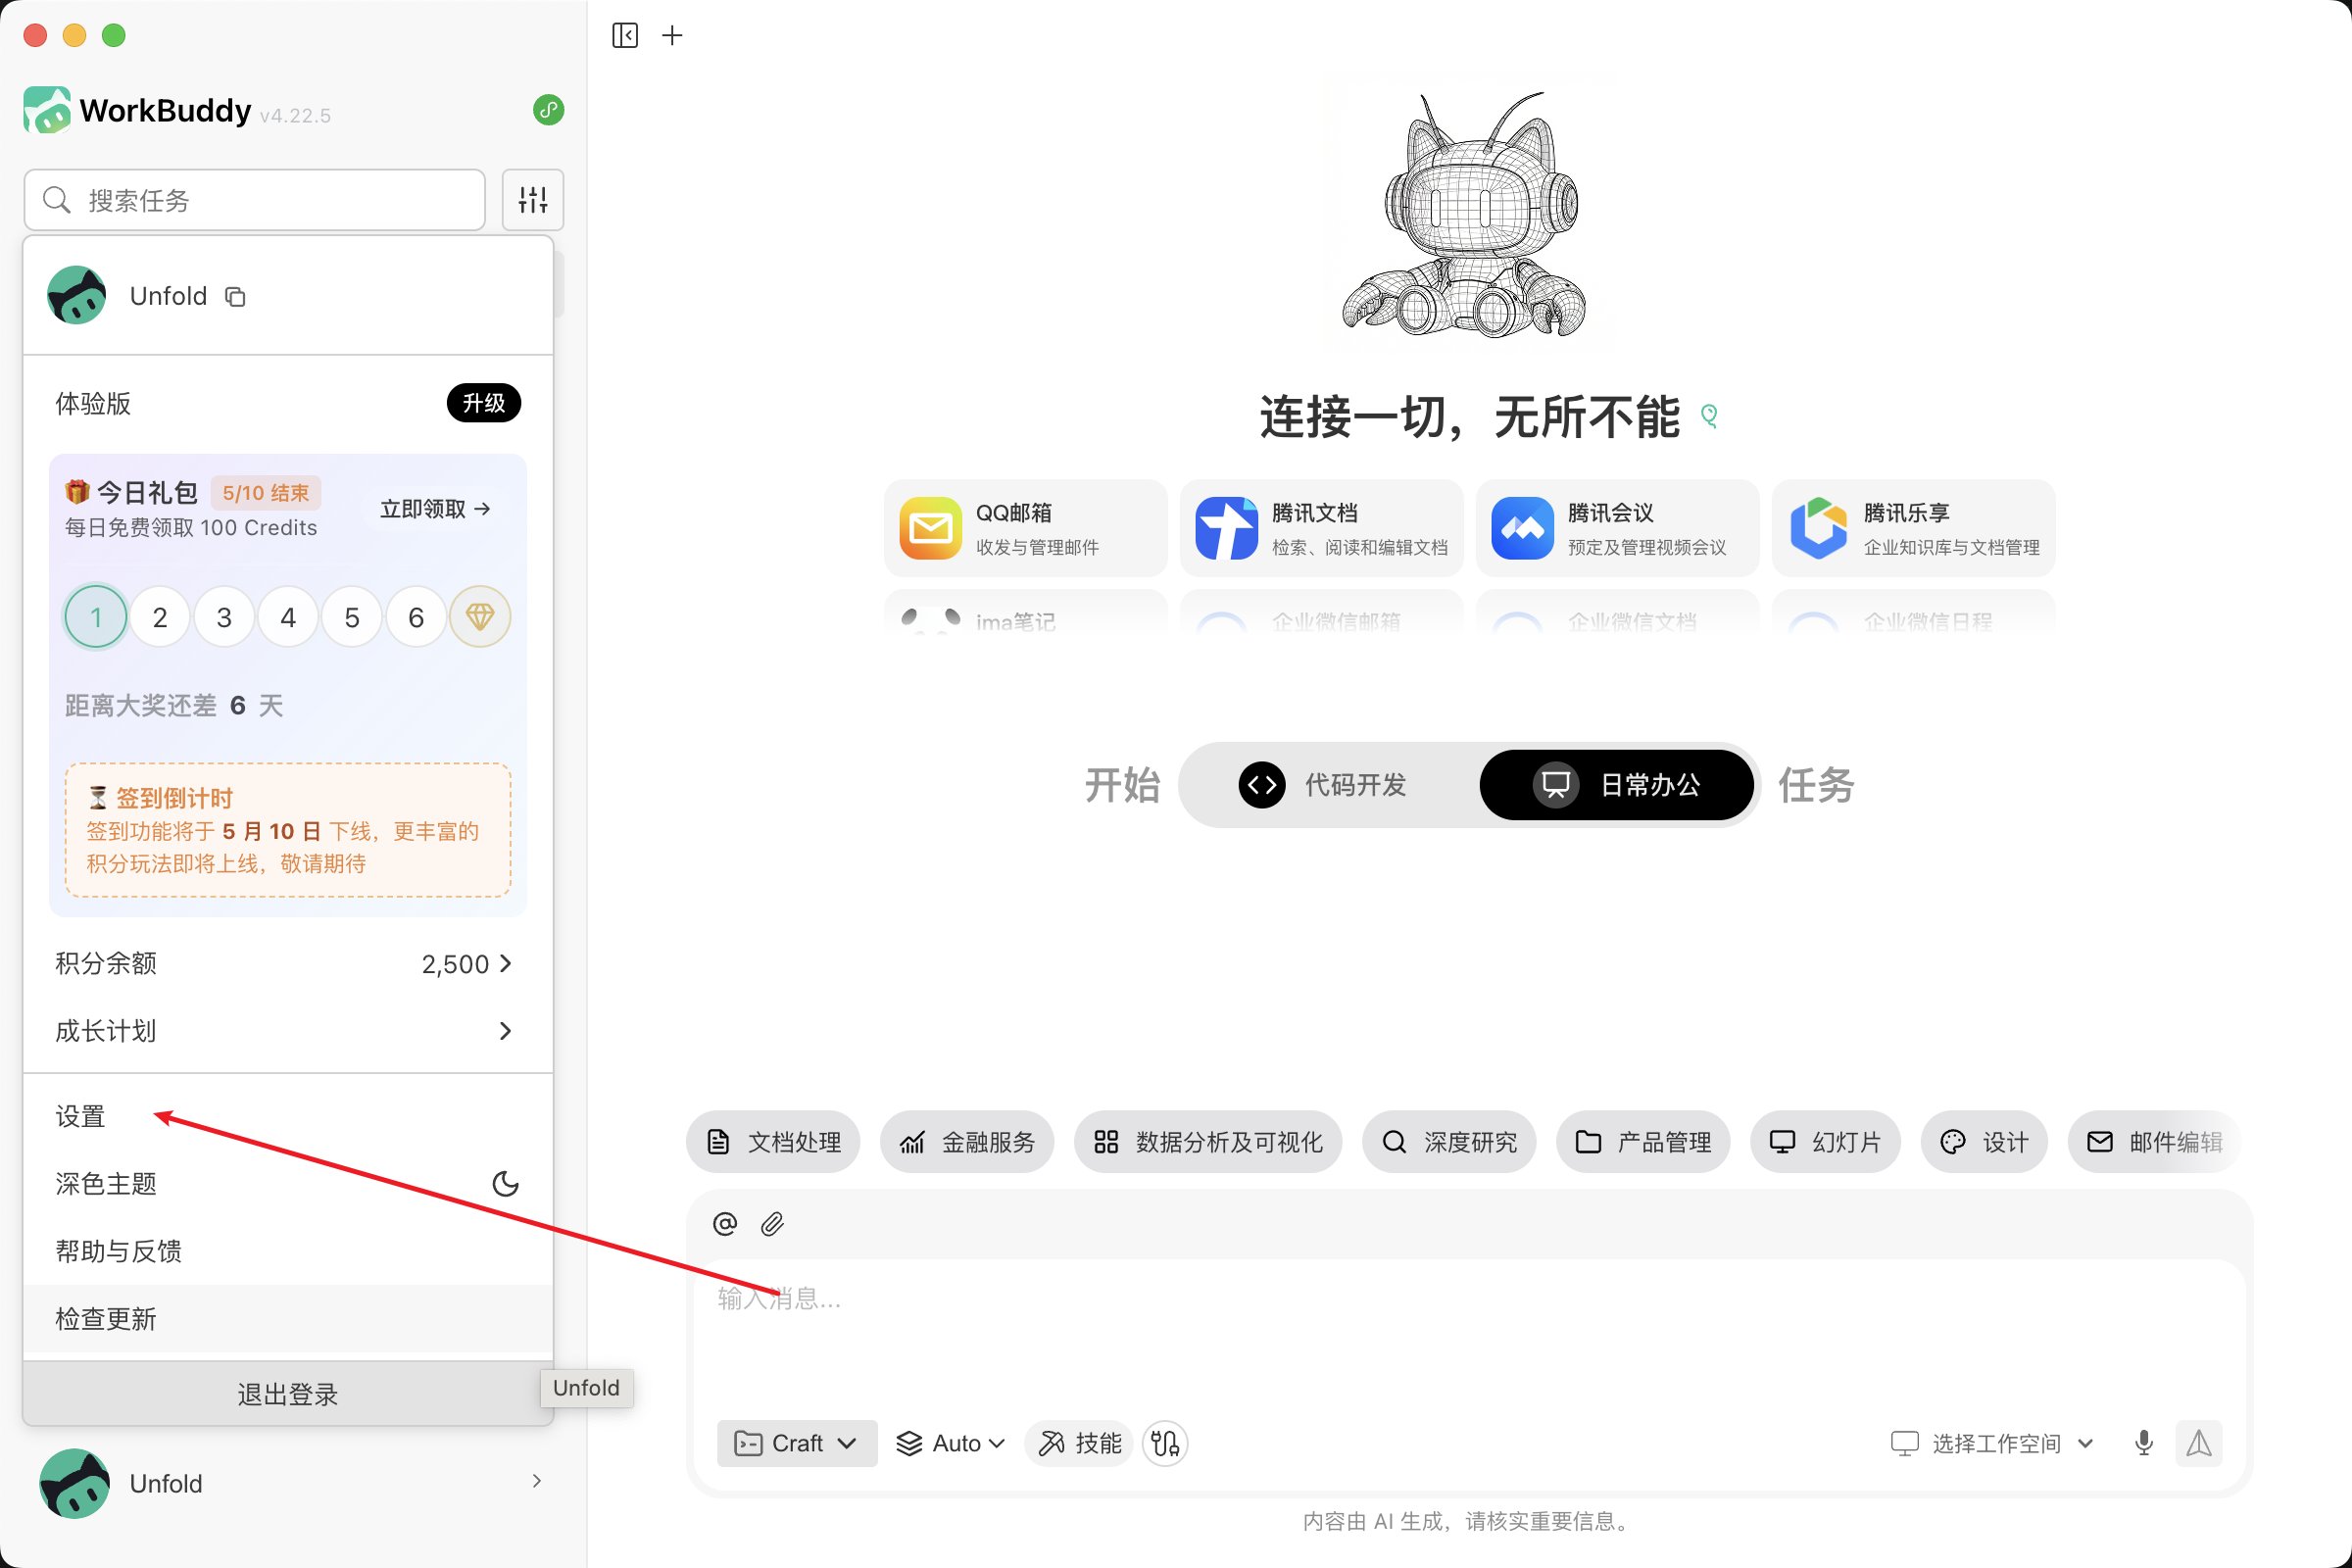
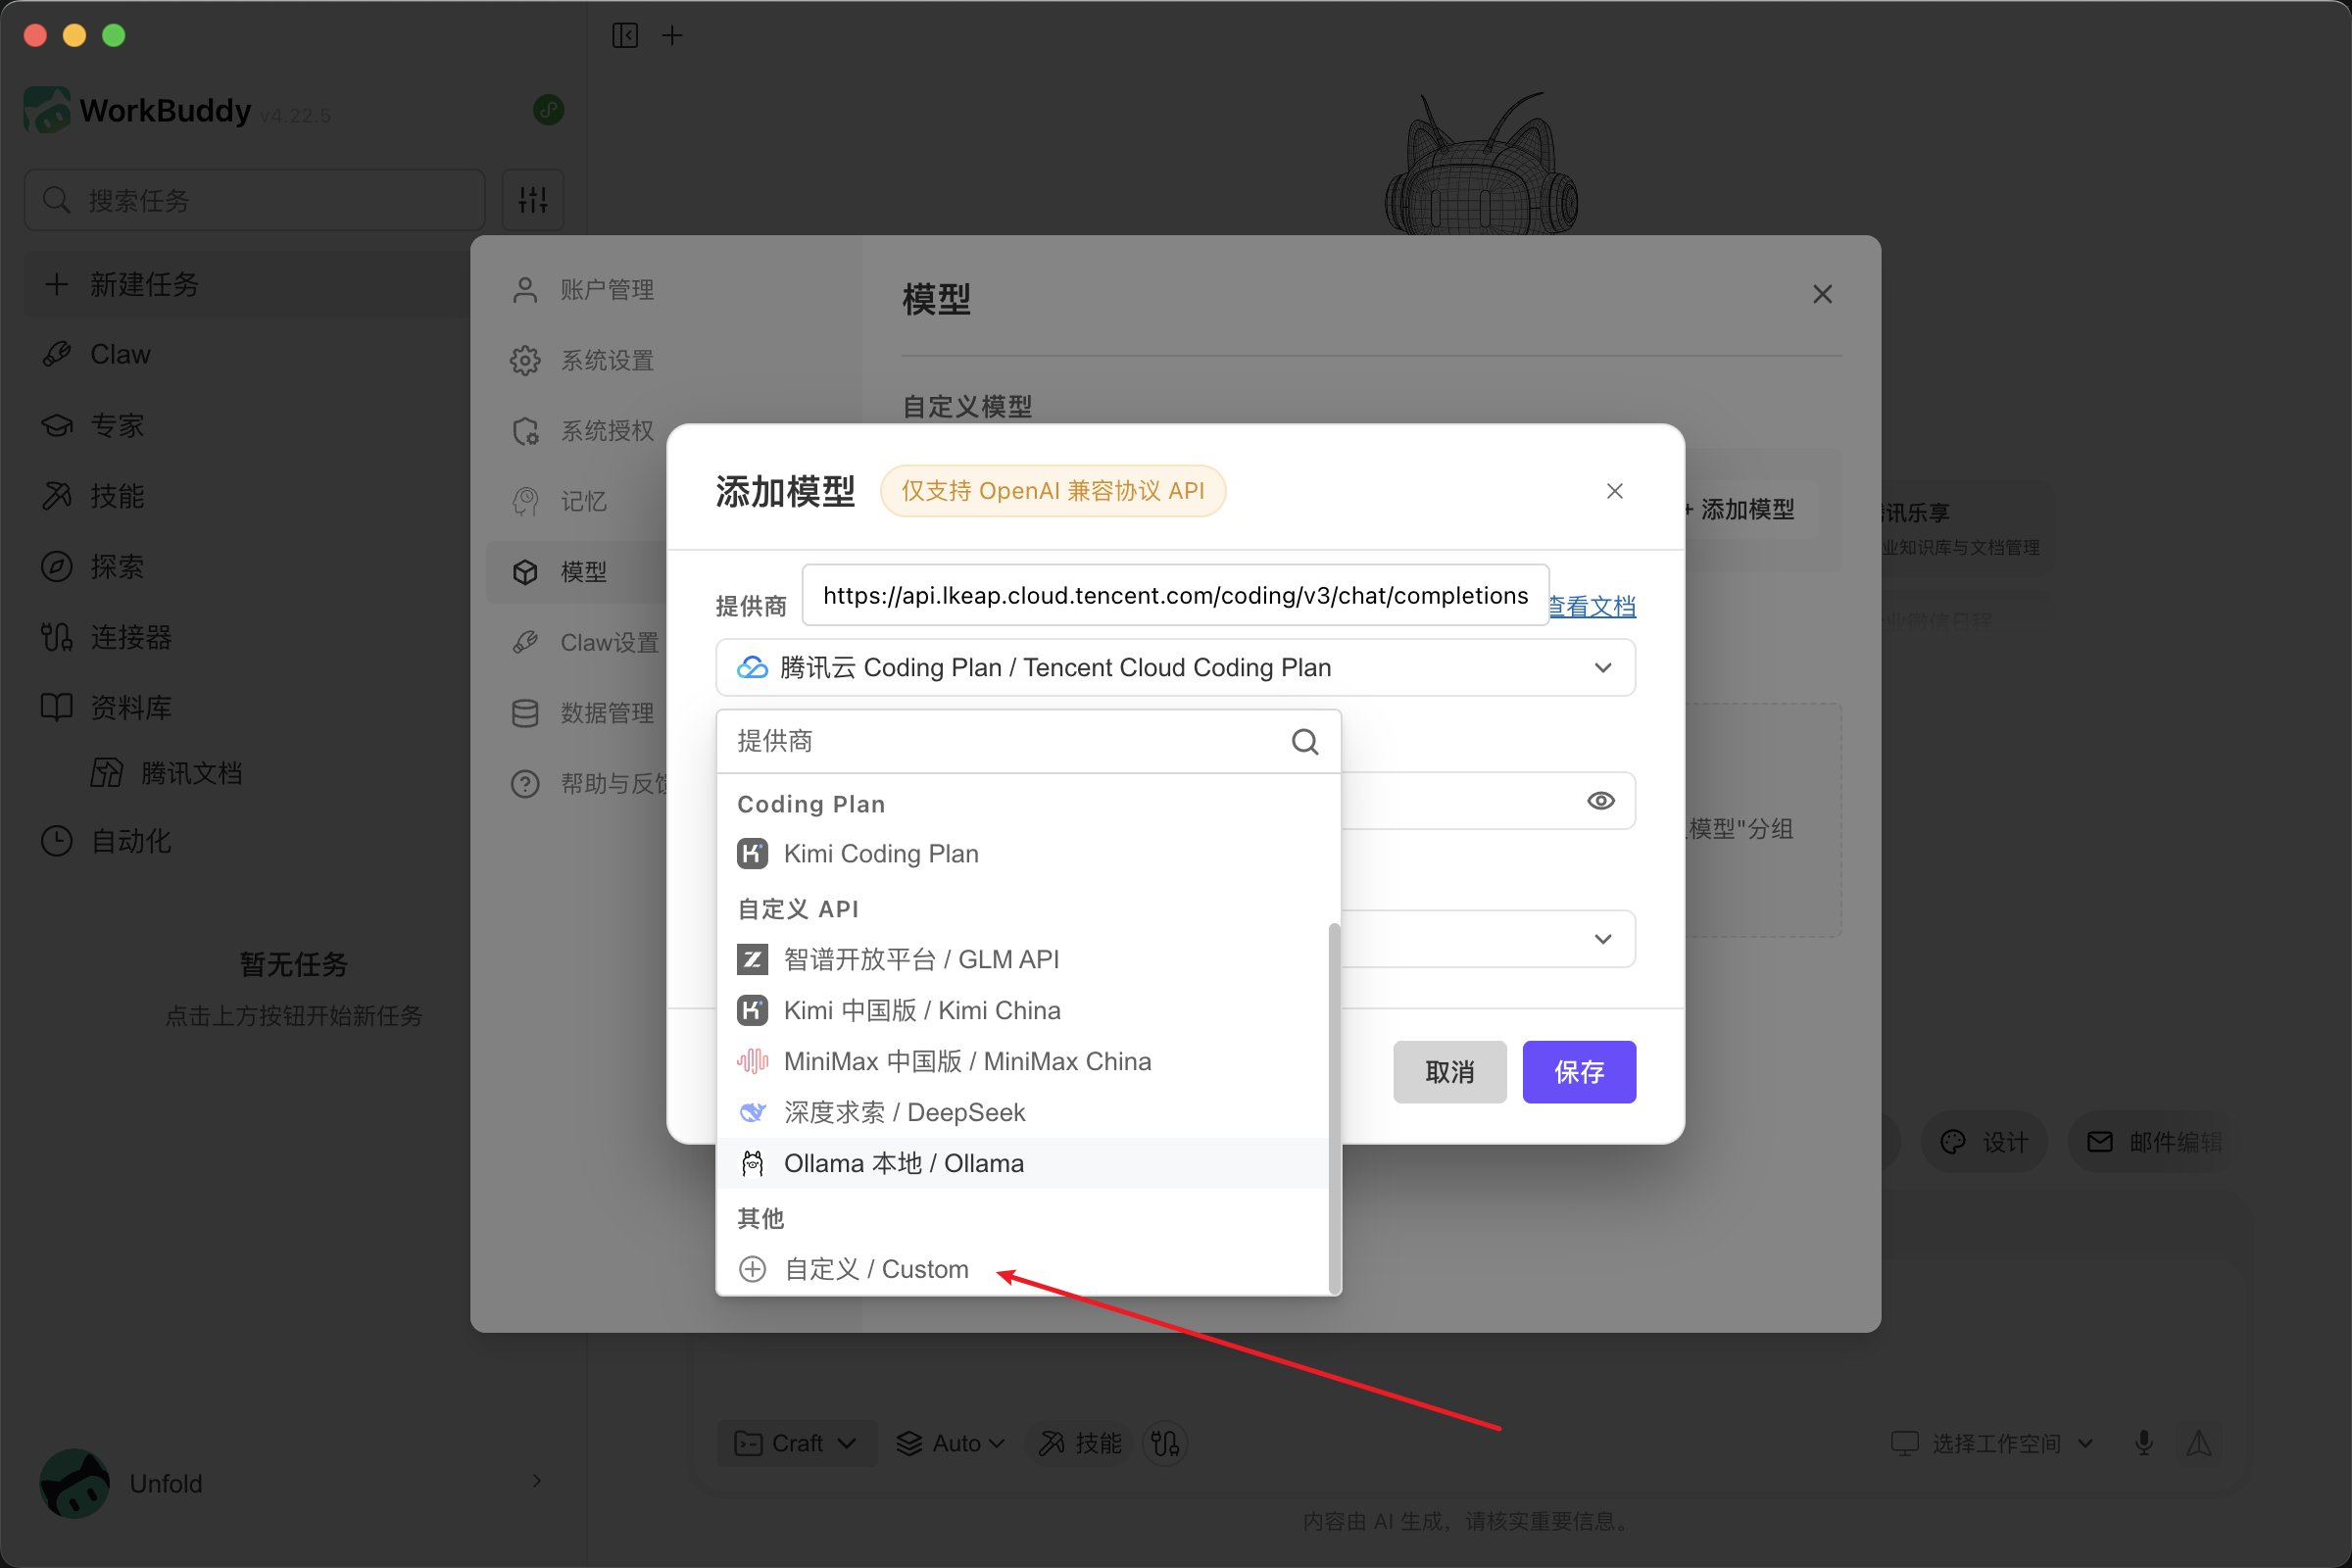
- Click Add Model, scroll the provider list to the bottom, and select Custom
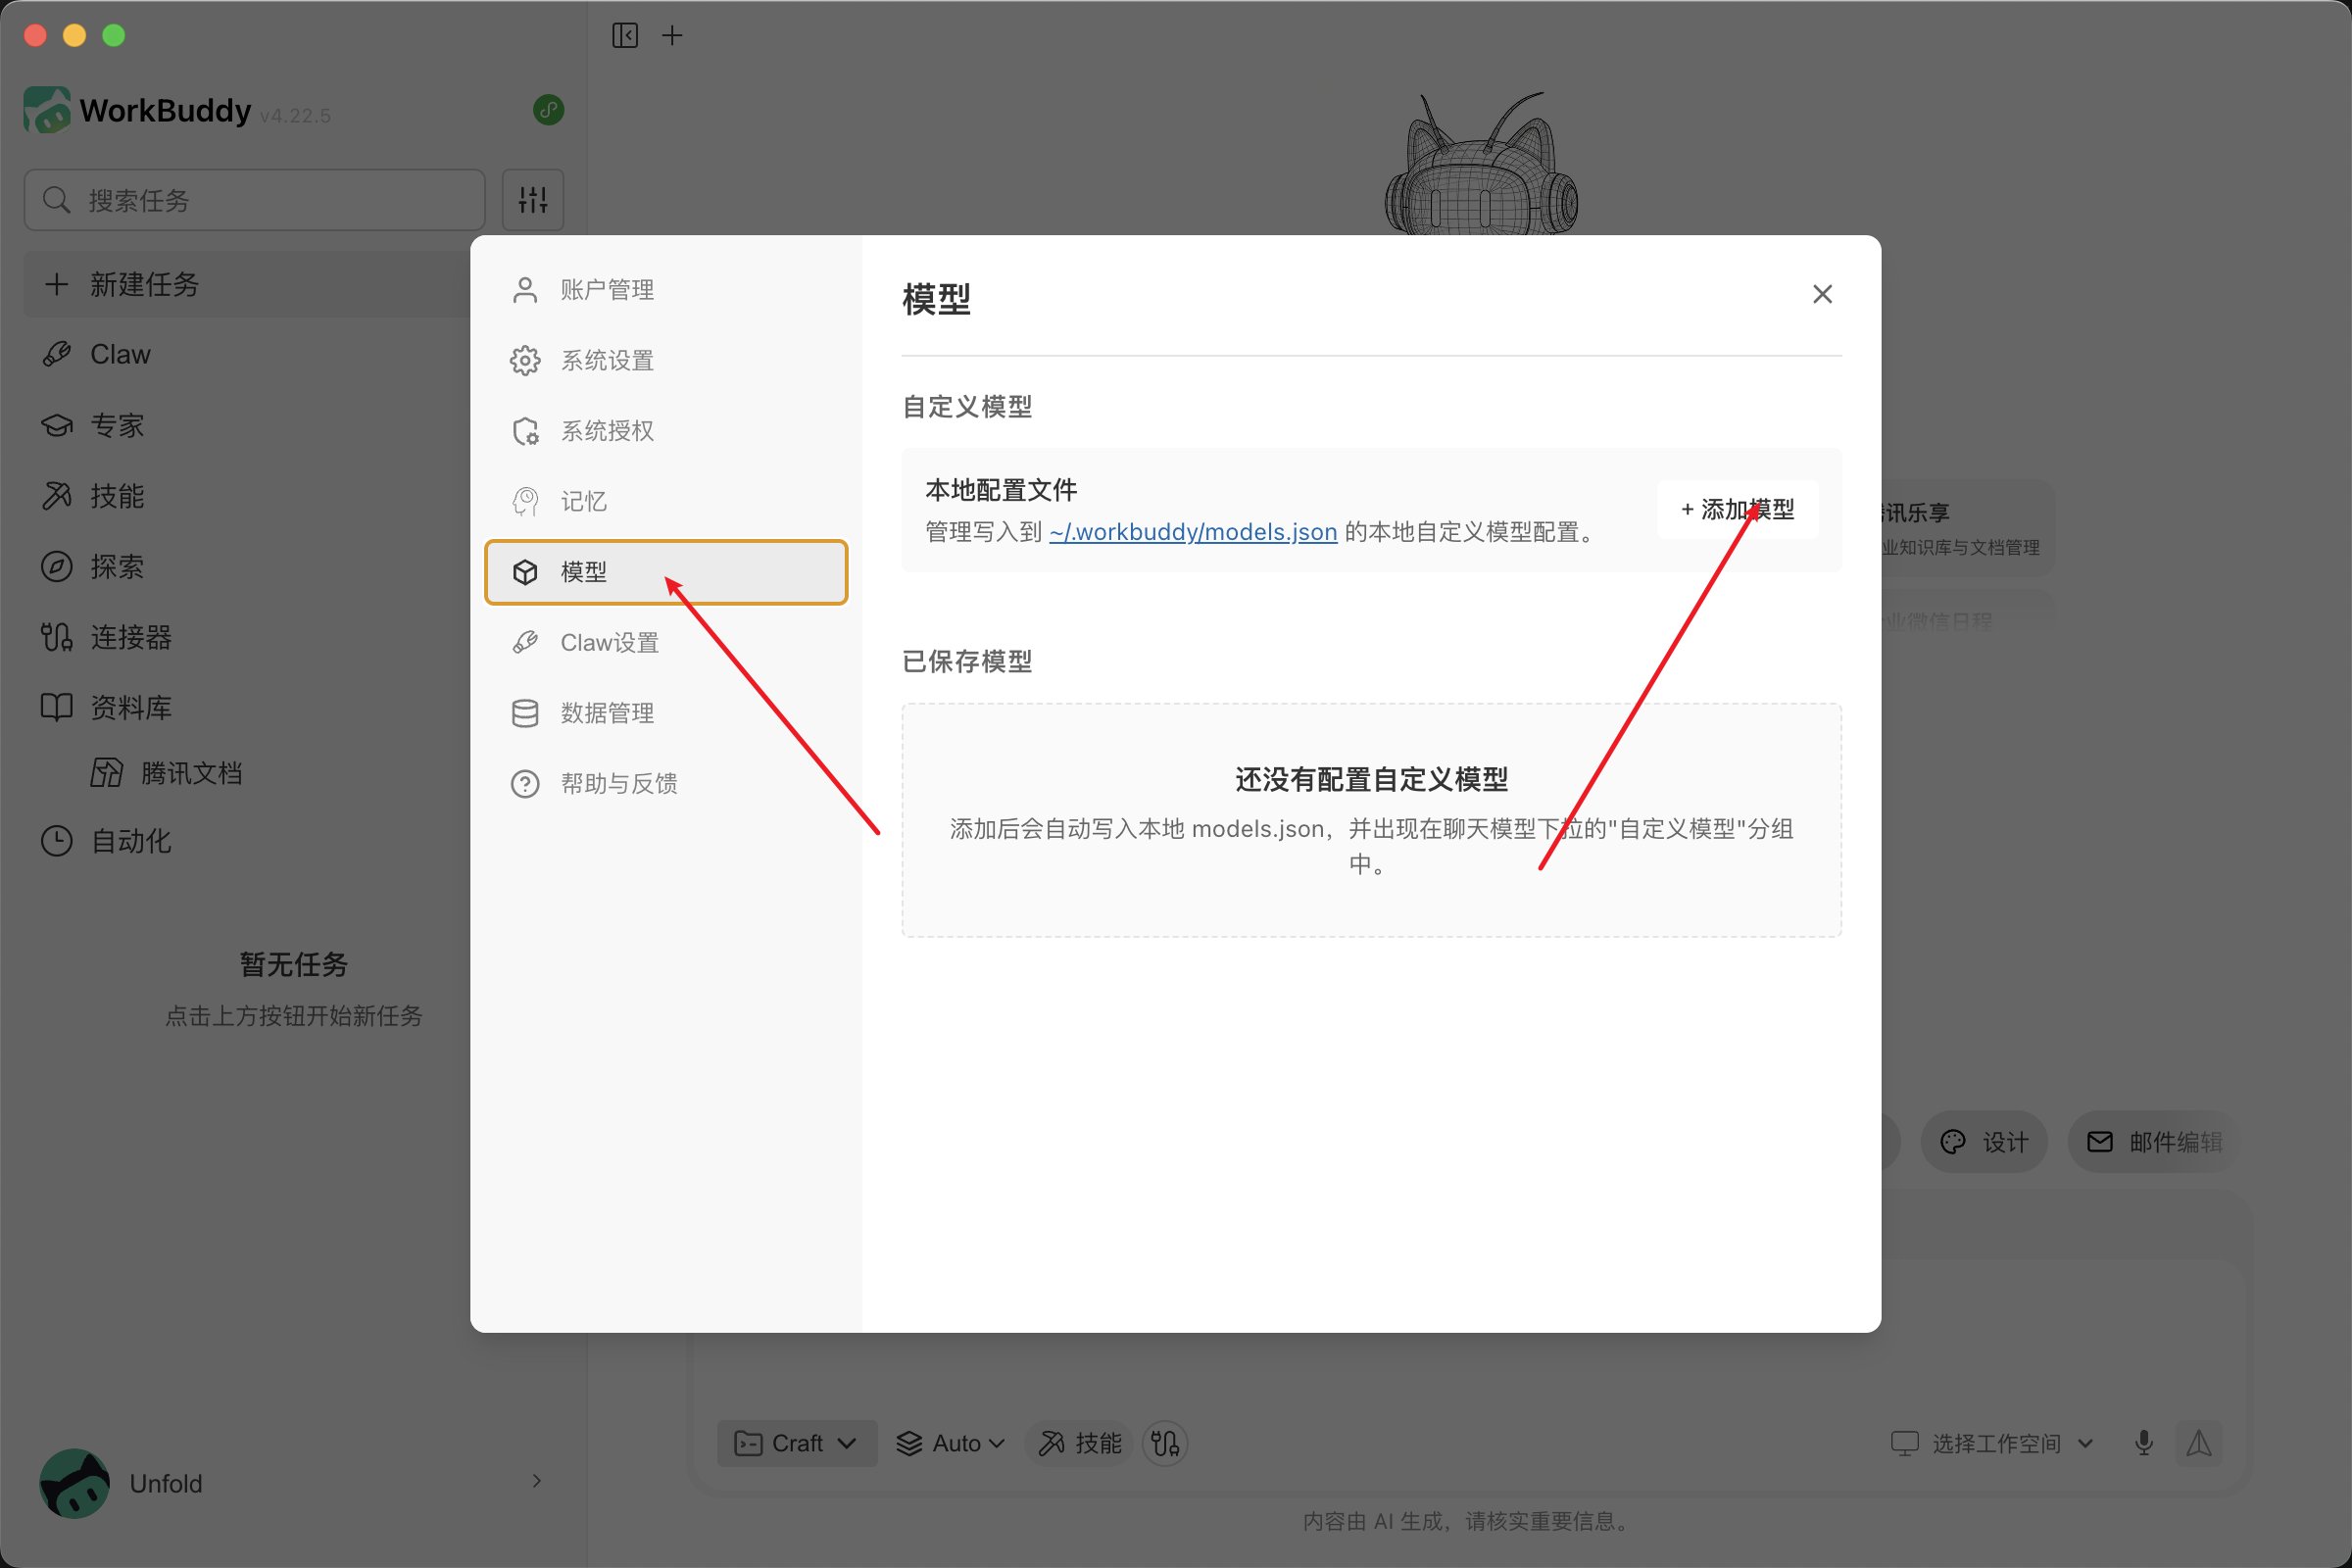
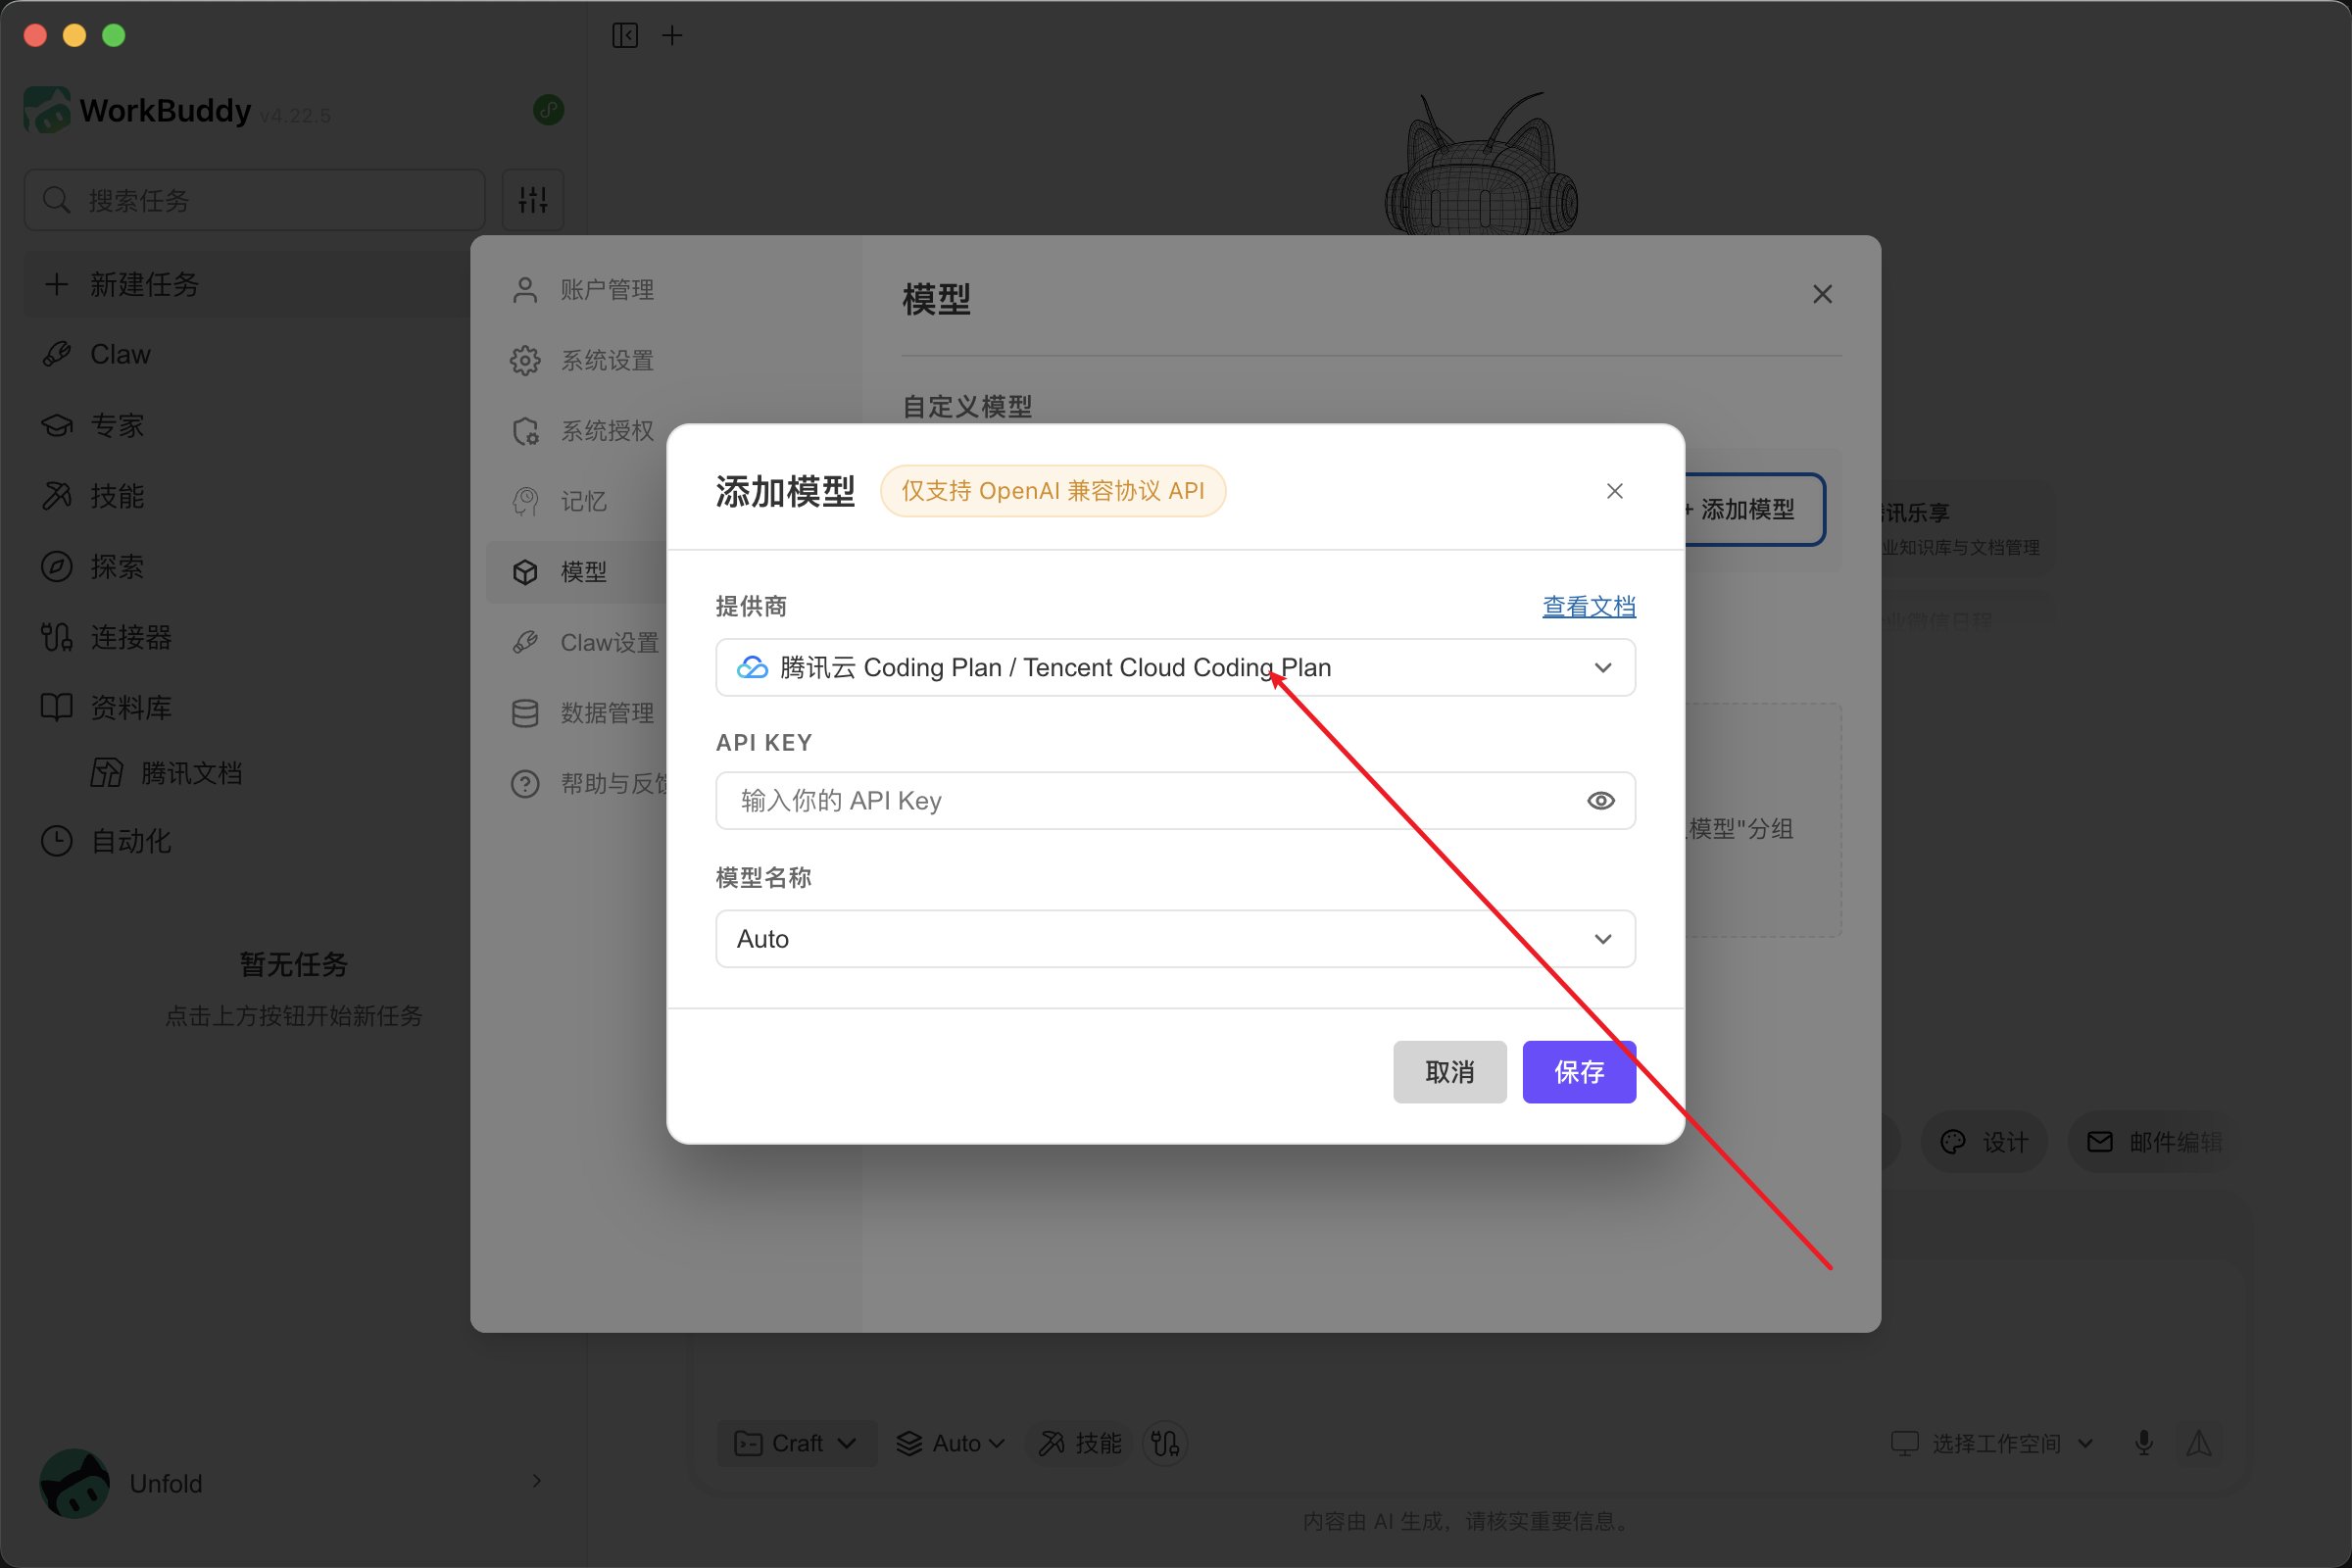
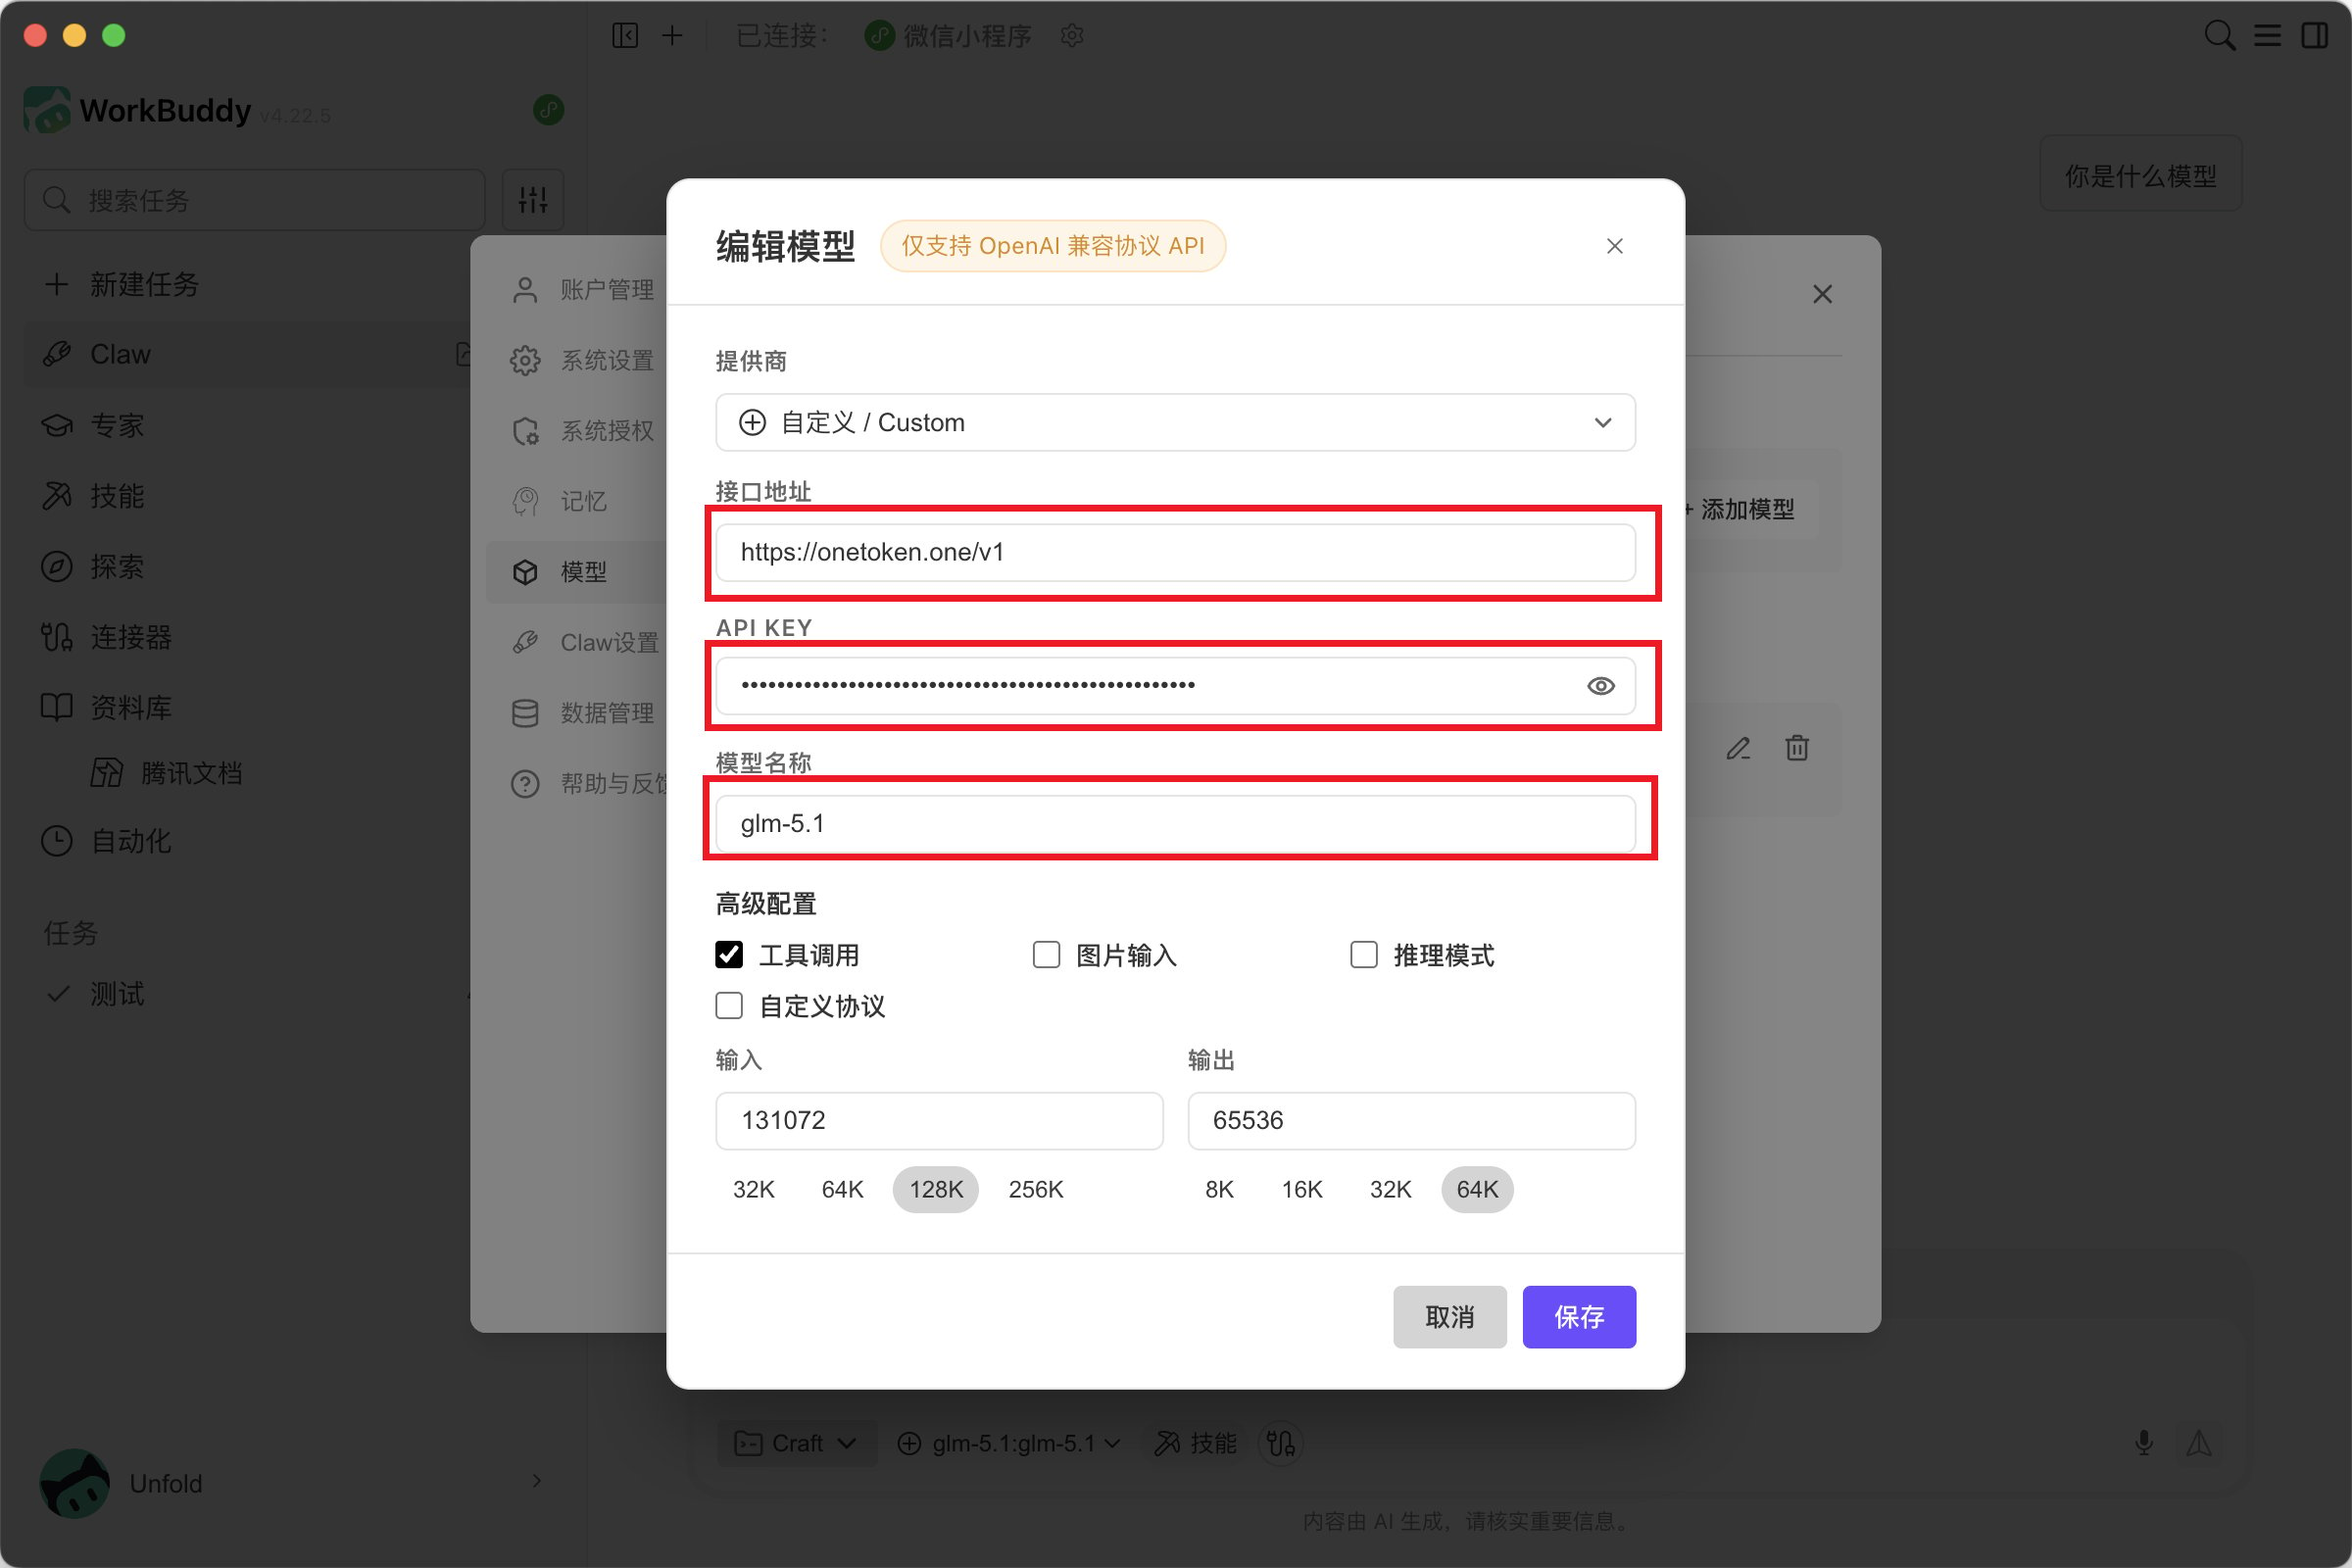
- Fill in the model details
- For the endpoint URL, enter
https://anyrouter.win/v1 - Set the API KEY to the API key obtained from the AnyRouter platform
- Set the model name to a model supported in the model list.
- Configure the advanced options according to the capabilities of the selected model Click Save when done
- For the endpoint URL, enter
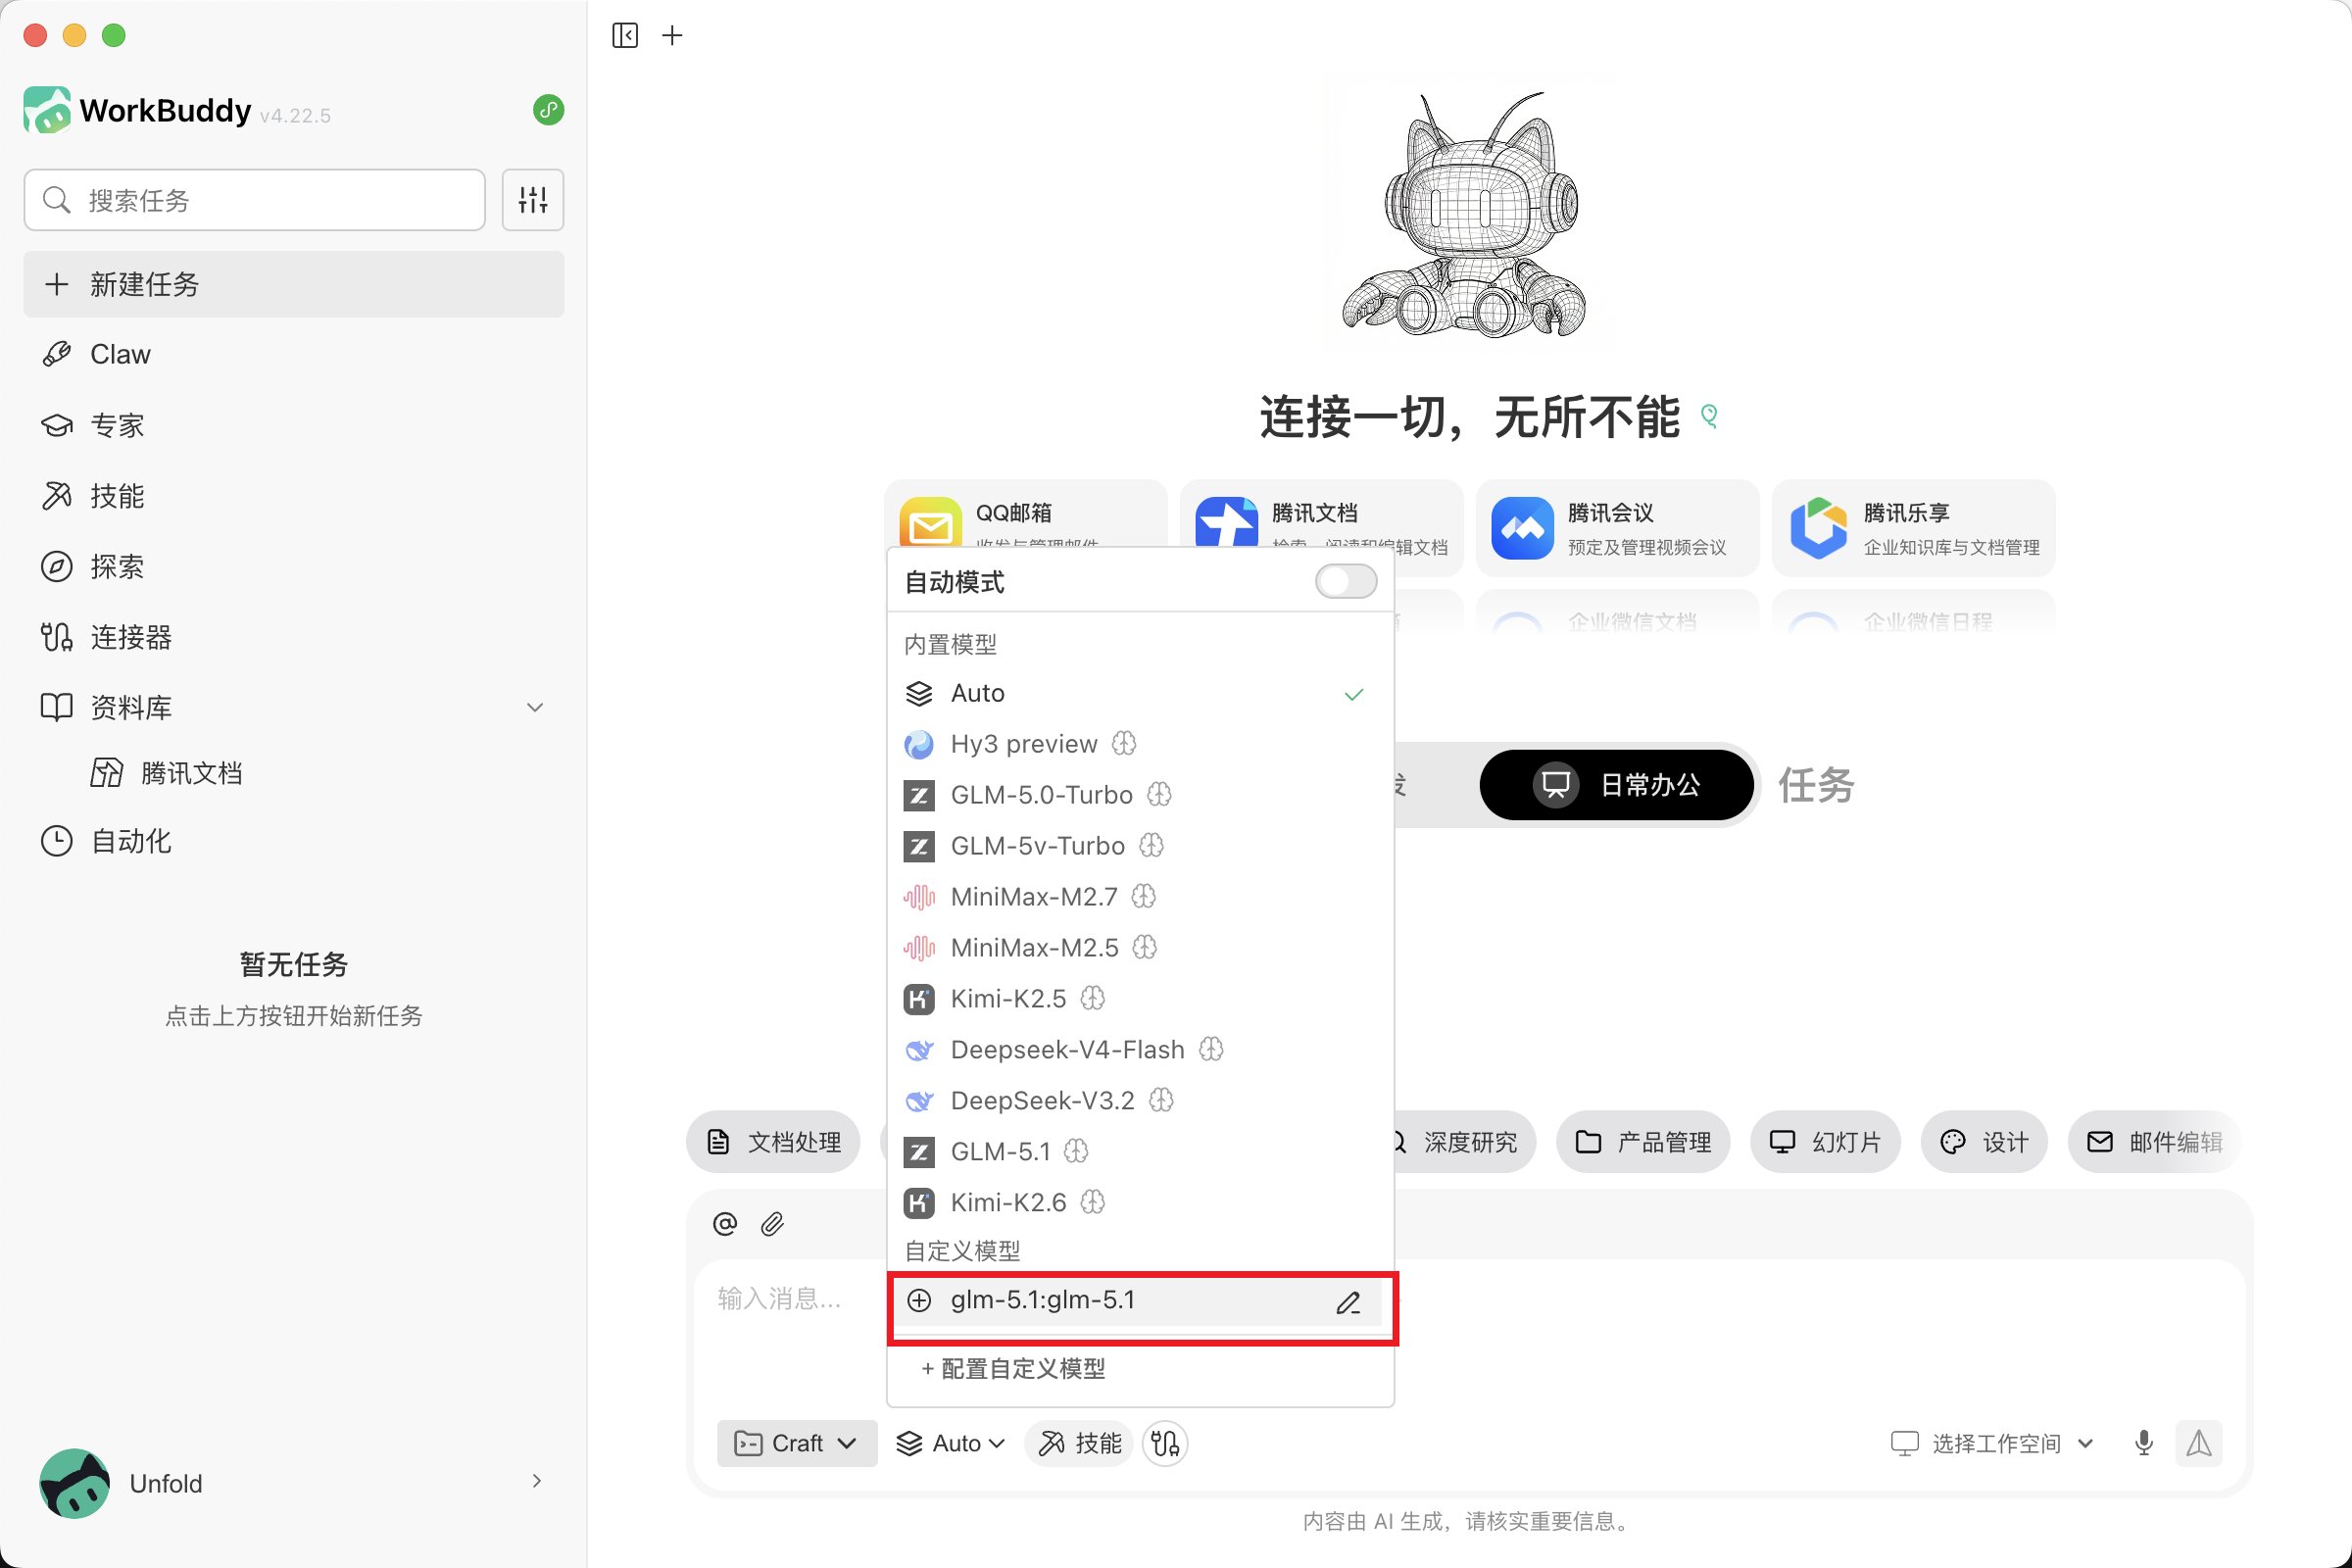
- Back in the main window, select the custom model you just added, and you can start using it.
Void Editor
Connect Void Editor, the open-source Cursor alternative, to AnyRouter: set the base URL and API key under OpenAI Compatible, add models, and fix common errors.
Chat Completions API
OpenAI-compatible chat completions API: call GPT, Claude, Gemini and more via /v1/chat/completions, with request samples, parameters and response fields.