Codex Installation and Configuration Guide
Install and configure the Codex CLI on Windows, macOS and Linux: create a codex-group API key, set up config.toml and auth.json for AnyRouter.
Windows Guide
System requirements
- Windows 10 or Windows 11
- Node.js 22+
- npm 10+
- Internet connection
Installation steps
Prerequisite!!! Install Git Bash: visit Git - Downloads, download the version for your system, then just keep clicking "Next" to finish the installation.
1. Install Node.js Visit the Node.js website to download and install the latest LTS version.
2. Install codex Open Command Prompt (CMD) or PowerShell and run:
npm install -g @openai/codex3. Verify the installation Open Command Prompt (CMD) or PowerShell and run:
codex --versionConfigure the API
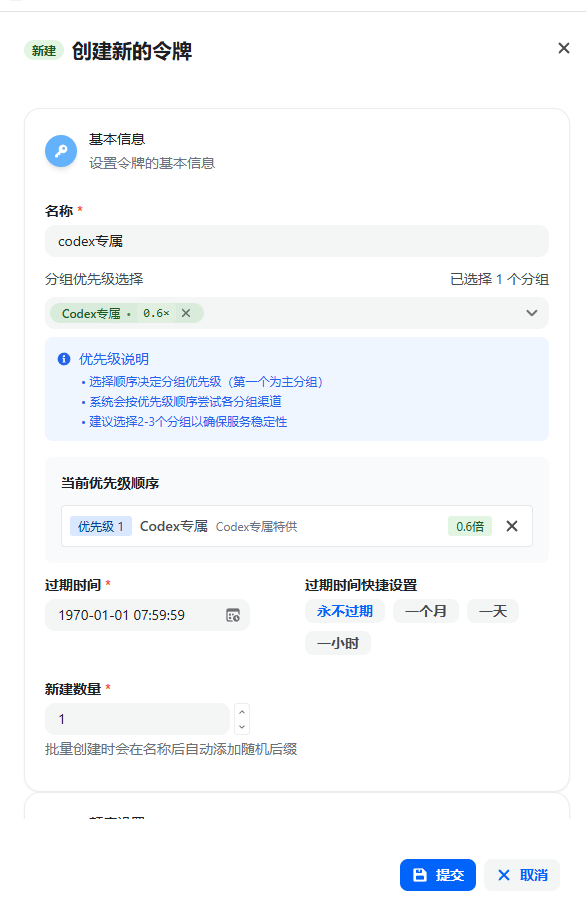
1. Get an Auth Token Visit the anyrouter.win site and do the following:
- Go to the Console → API Keys page
- Click Add API Key
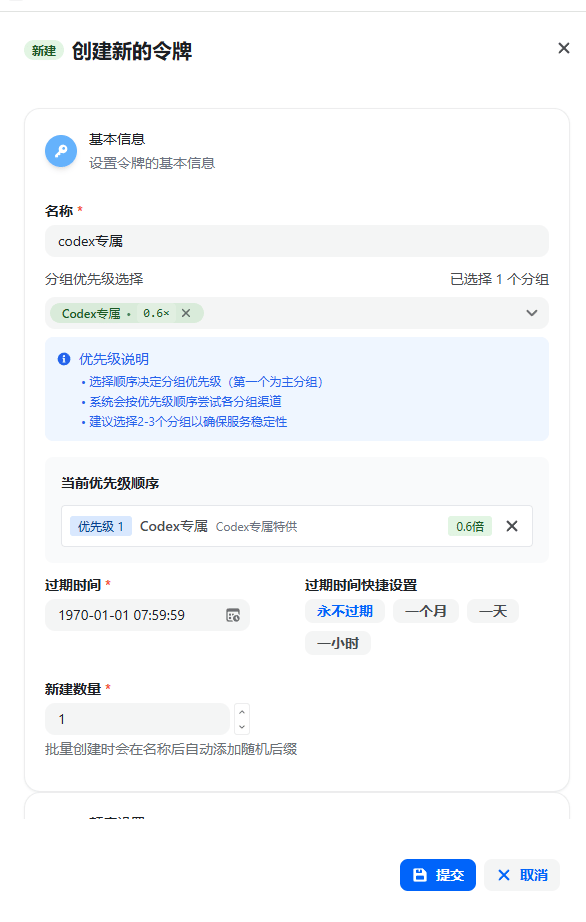
- For the key group, select codex专属 (Codex-only) — be sure to select this group, otherwise it will not work
- The key name can be anything
- Credits: we recommend setting unlimited credits
- Leave the other options at their defaults
2. Configuration files
Important: replace
sk-xxxbelow with the actual API key you generated on anyrouter.win! Important: replacesk-xxxbelow with the actual API key you generated on anyrouter.win! Important: replacesk-xxxbelow with the actual API key you generated on anyrouter.win!
- Go to the
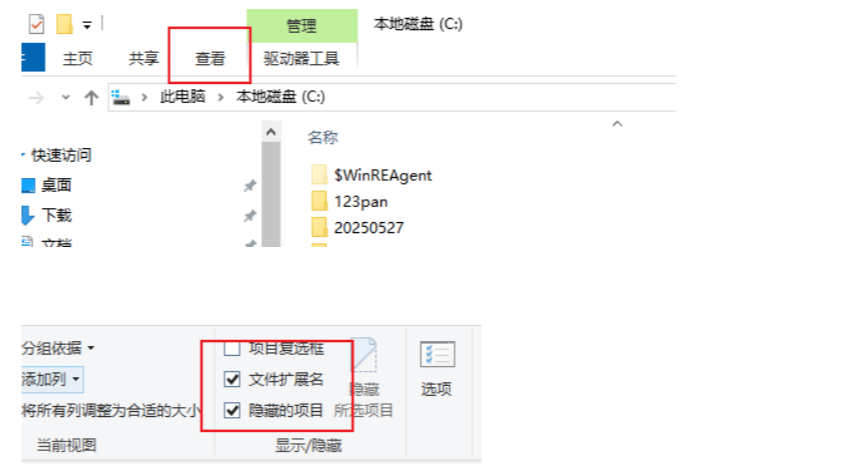
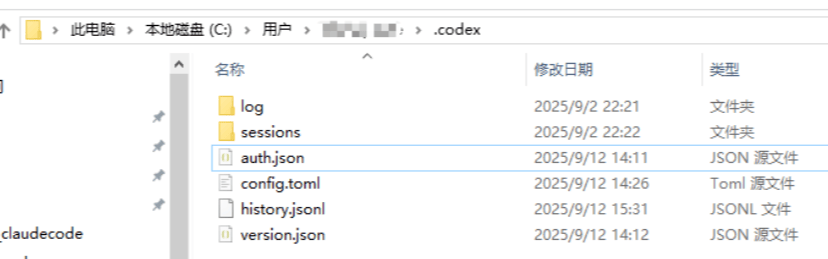
.codexfolder in your user directory, e.g.C:\Users\testuser\.codex. (Note: if you cannot see this directory, "Show hidden items" is not enabled in Windows — turn it on in File Explorer first.)
- If the
.codexfolder does not exist, create it manually, then create two files inside it:config.tomlandauth.json.
 3. Fill in the configuration (replace
 sk-xxx with the real key you created).
a. Configuration in auth.json:
{"OPENAI_API_KEY": "sk-xxx"}b. Configuration in config.toml (just paste the content below):
model_reasoning_effort accepts high, medium, or low, indicating how much effort the model puts into reasoning.
model_provider = "api111"
model = "gpt-5-codex"
model_reasoning_effort = "high"
disable_response_storage = true
preferred_auth_method = "apikey"

[model_providers.api111]
name = "api111"
base_url = "https://anyrouter.win/v1"
wire_api = "responses"
Launch codex
Restart your terminal! Restart your terminal! Restart your terminal! Then go to your project directory:
cd your-project-folderRun the following command to start:
codex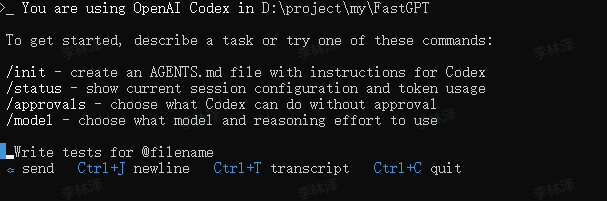
The codex VS Code extension
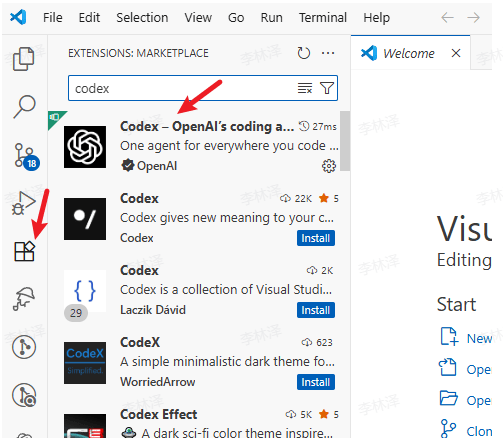
Once the configuration above is done, search for and install codex in the VS Code extension marketplace.
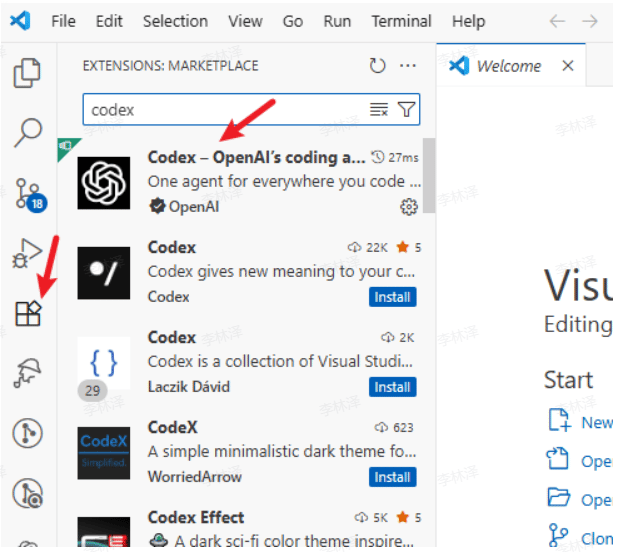
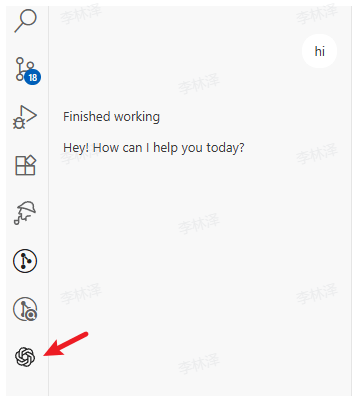
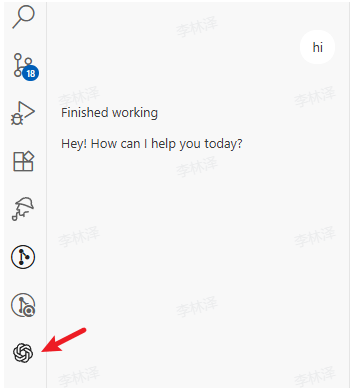
After installation, it appears in the sidebar.
macOS Guide
System requirements
- macOS 12 or later
- Node.js 22+
- npm 10+
- Internet connection
Installation steps
1. Install Node.js
-
Option 1: visit the Node.js website to download and install the latest LTS version.
-
Option 2: use Homebrew (recommended)
# If Homebrew is not installed yet, run this command first
/bin/bash -c "$(curl -fsSL [https://raw.githubusercontent.com/Homebrew/install/HEAD/install.sh](https://raw.githubusercontent.com/Homebrew/install/HEAD/install.sh))"

# Install Node.js
brew install node
2. Install codex
Open Terminal and run (you may need sudo):
npm install -g @openai/codex3. Verify the installation Open Terminal and run:
codex --versionConfigure the API
1. Get an Auth Token Visit the anyrouter.win site and do the following:
- Go to the Console → API Keys page
- Click Add API Key
- For the key group, select codex特供 (Codex special) — be sure to select this group, otherwise it will not work
- The key name can be anything
- Credits: we recommend setting unlimited credits
- Leave the other options at their defaults
2. Configuration files
Important: replace
sk-xxxbelow with the actual API key you generated on anyrouter.win! Important: replacesk-xxxbelow with the actual API key you generated on anyrouter.win! Important: replacesk-xxxbelow with the actual API key you generated on anyrouter.win!
-
Create the directory and files:
mkdir -p ~/.codex touch ~/.codex/auth.json touch ~/.codex/config.toml -
Edit the
auth.jsonfile:vi ~/.codex/auth.jsonPress
ito enter insert mode, paste the following content (replacesk-xxxwith your key), then pressESC, type:wq, and press Enter to save and exit.{ "OPENAI_API_KEY": "sk-xxx" } -
Edit the
config.tomlfile:vi ~/.codex/config.tomlPress
ito enter insert mode, paste the following content, then pressESC, type:wq, and press Enter to save and exit.model_provider = "api111" model = "gpt-5-codex" model_reasoning_effort = "high" disable_response_storage = true preferred_auth_method = "apikey" [model_providers.api111] name = "api111" base_url = "https://anyrouter.win/v1" wire_api = "responses"
Launch codex
Restart your terminal! Restart your terminal! Restart your terminal! Then go to your project directory:
cd your-project-folderRun the following command to start:
codex[image]
The codex VS Code extension
Once the configuration above is done, search for and install codex in the VS Code extension marketplace.
[image]
After installation, it appears in the sidebar. [image]
Linux Guide
System requirements
- A mainstream Linux distribution (Ubuntu 20.04+, Debian 10+, CentOS 7+, etc.)
- Node.js 22+
- npm 10+
- Internet connection
Installation steps
1. Install Node.js
- Ubuntu/Debian
sudo apt update curl -fsSL [https://deb.nodesource.com/setup_lts.x](https://deb.nodesource.com/setup_lts.x) | sudo -E bash - sudo apt-get install -y nodejs - CentOS/RHEL/Fedora
# Use dnf (Fedora) or yum (CentOS/RHEL) sudo dnf install nodejs npm # or sudo yum install nodejs npm - Arch Linux
sudo pacman -S nodejs npm
2. Install codex Open Terminal and run:
sudo npm install -g @openai/codex3. Verify the installation Open Terminal and run:
codex --versionConfigure the API
1. Get an Auth Token Visit the anyrouter.win site and do the following:
- Go to the Console → API Keys page
- Click Add API Key
- For the key group, select codex渠道-gpt (Codex channel - GPT) — be sure to select this group, otherwise it will not work
- The key name can be anything
- Credits: we recommend setting unlimited credits
- Leave the other options at their defaults [image]
2. Configuration files
Important: replace
sk-xxxbelow with the actual API key you generated on anyrouter.win! Important: replacesk-xxxbelow with the actual API key you generated on anyrouter.win! Important: replacesk-xxxbelow with the actual API key you generated on anyrouter.win!
-
Create the directory and files:
mkdir -p ~/.codex touch ~/.codex/auth.json touch ~/.codex/config.toml -
Edit the
auth.jsonfile:vi ~/.codex/auth.jsonPress
ito enter insert mode, paste the following content (replacesk-xxxwith your key), then pressESC, type:wq, and press Enter to save and exit.{ "OPENAI_API_KEY": "sk-xxx" } -
Edit the
config.tomlfile:vi ~/.codex/config.tomlPress
ito enter insert mode, paste the following content, then pressESC, type:wq, and press Enter to save and exit.model_provider = "api111" model = "gpt-5-codex" model_reasoning_effort = "high" disable_response_storage = true preferred_auth_method = "apikey" [model_providers.api111] name = "api111" base_url = "https://anyrouter.win/v1" wire_api = "responses"
Launch codex
Restart your terminal! Restart your terminal! Restart your terminal! Then go to your project directory:
cd your-project-folderRun the following command to start:
codex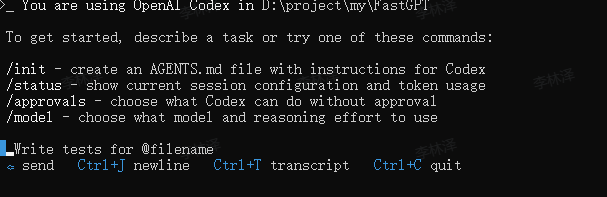
The codex VS Code extension
Once the configuration above is done, search for and install codex in the VS Code extension marketplace.
After installation, it appears in the sidebar.
FAQ
If you hit an error, troubleshoot as follows:
- Confirm the API key was created correctly: credits set to unlimited credits, no model restrictions, and group set to codex渠道-gpt.
For more codex configuration and usage details, see the official codex documentation.
Coder Configuration
Illustrated guide to configuring the AnyRouter API in Coder: pick the OpenAI provider, set the BaseURL and API key, bind models and run a chat test to verify.
Costrict Configuration Guide
Configure the open-source coding tool CoStrict with AnyRouter: install the CLI, add a custom provider via cs web, or use OpenAI Compatible in VS Code.